目录
一、套接字(socket)
Socket是应用层与TCP/IP协议族通信的中间软件抽象层,它是一组接口。在设计模式中,Socket其实就是一个门面模式,它把复杂的TCP/IP协议族隐藏在Socket接口后面,对用户来说,一组简单的接口就是全部,让Socket去组织数据,以符合指定的协议。

1、UDP套接字编程
基本说明
运行在不同机器上的进行彼此通过向套接字发送报文来进行通信。当使用UDP时,必须先将目的地址附在该分组之上。目的地址包含什么?–>目的主机的IP地址和目的地套接字的端口号组成。
实现如下客户–服务器应用程序:
(1)客户从其键盘读取一行字符(数据)并将该数据向服务器发送。
(2)服务器接收该数据并将这些字符转换为大写。
(3)服务器将修改的数据发送给客户。
(4)客户接收修改的数据并在其监视器上将该行显示出来。

2、TCP套接字编程
基本说明
与UDP不同,TCP为面向连接的协议。提供端到端的可靠传输。这就意味着在客户端和服务器端能发送数据之前先要握手(也就是大家熟知的三次握手)和创建一个TCP连接。因此创建TCP连接时,需要将其与客户套接字地址和服务器套接字地址关联起来。当发送数据时,只需要经过套接字将数据放入TCP连接。与UDP不同,UDP在将分组放入套接字之前必须为其附上一个目的地址。
在三次握手期间,客户进程先敲服务器进程的欢迎之门。当服务器收到信息后会生成一个新的套接字,专门用于特定的客户。然后对应专门的客户进行连接会生成新的套接字,称为连接套接字。
欢迎套接字:所有要与服务器通信的客户的起始接触点。
连接套接字:随后为了每个客户通信而生成的套接字。

实现如下客户–服务器应用程序的流程图:

二、控制台的简单hello world程序
目标:
用C#、Java或python编写一个命令行/控制台的简单hello world程序,实现如下功能:在屏幕上连续输出50行“hello cqjtu!重交物联2019级”;同时打开一个网络UDP 套接字,向另一台室友电脑发送这50行消息。
1.创建新项目
打开visual studio2019,点击创建新项目:

选择控制台应用:


2.编写代码
(1)在控制台上简单输出:
在program.cs里编写代码:
using System;
using System.Collections.Generic;
using System.Linq;
using System.Text;
using System.Threading.Tasks;

namespace hello
{
    class Program
    {
        static void Main(string[] args)
        {
            for (int i = 0; i < 50; i++)
            {
                Console.WriteLine("{0}:hello cqjtu!重交物联2019级", (i + 1));
            }
            System.Console.ReadKey();
        }
    }
}
运行:

(2)使用 UDP 通信
在我的电脑上运行一个客户端代码,在我室友的电脑上运行一个服务端的代码,就可以实现通信功能。
在我自己的电脑上使用 VS2019 创建一个新项目 client ,并将下列代码复制粘贴进去。
client:
using System;
using System.Collections.Generic;
using System.Linq;
using System.Net;
using System.Net.Sockets;
using System.Text;
using System.Threading.Tasks;

namespace Client
{
    class Program
    {
        static void Main(string[] args)
        {
            //提示信息
            Console.WriteLine("按下任意按键开始发送...");
            Console.ReadKey();

            int m;

            //做好链接准备
            UdpClient client = new UdpClient();  //实例一个端口
            IPAddress remoteIP = IPAddress.Parse("192.168.43.251");  //假设发送给这个IP
            int remotePort = 11000;  //设置端口号
            IPEndPoint remotePoint = new IPEndPoint(remoteIP, remotePort);  //实例化一个远程端点

            for (int i = 0; i < 50; i++)
            {
                //要发送的数据:第n行:hello cqjtu!重交物联2018级
                string sendString = null;
                m = i + 1;
                sendString += m.ToString();
                sendString += ":hello cqjtu!重交物联2019级";

                //定义发送的字节数组
                //将字符串转化为字节并存储到字节数组中
                byte[] sendData = null;
                sendData = Encoding.Default.GetBytes(sendString);

                client.Send(sendData, sendData.Length, remotePoint);//将数据发送到远程端点
            }
            client.Close();//关闭连接

            //提示信息
            Console.WriteLine("");
            Console.WriteLine("数据发送成功,按任意键退出...");
            System.Console.ReadKey();
        }
    }
}
代码解析
①首先显示提示信息,等待使用人员操作;
②做好连接准备,如:设置IP、端口号等;
③ for 循环发送数据;
④关闭端口;
⑤显示提示信息,等待用户确认退出。
在另一台电脑上新建一个server,写入代码:
using System;
using System.Collections.Generic;
using System.Linq;
using System.Net;
using System.Net.Sockets;
using System.Text;
using System.Threading.Tasks;

namespace Server
{
    class Program
    {
        static void Main(string[] args)
        {
            int result;
            string str = "50:hello cqjtu!重交物联2019级";
            UdpClient client = new UdpClient(11000);
            string receiveString = null;
            byte[] receiveData = null;
            //实例化一个远程端点,IP和端口可以随意指定,等调用client.Receive(ref remotePoint)时会将该端点改成真正发送端端点
            IPEndPoint remotePoint = new IPEndPoint(IPAddress.Any, 0);
            Console.WriteLine("正在准备接收数据...");
            while (true)
            {
                receiveData = client.Receive(ref remotePoint);//接收数据
                receiveString = Encoding.Default.GetString(receiveData);
                Console.WriteLine(receiveString);
                result = String.Compare(receiveString, str);
                if (result == 0)
                {
                    break;
                }
            }
            client.Close();//关闭连接
            Console.WriteLine("");
            Console.WriteLine("数据接收完毕,按任意键退出...");
            System.Console.ReadKey();
        }
    }
}
代码分析:
①做好连接准备,并设置结束标志;
②循环接收数据;
③关闭连接;
④显示提示信息,等待用户确定退出。
两端运行:
发送端:

接收端:

wireshark_200">3.使用wireshark抓包
过滤UDP,可以看到有50条信息,使用的UDP协议,端口11000,能看到英文和字符信息:

查看追踪流:

选择GBK编码,可以看到50条信息的具体内容:

三、Form窗口程序使用 UDP 通信
1.新建项目
使用VS2019创建一个Windows窗体应用:
创建完毕:

2.设计窗口
打开工具箱,拖入2个文本框 textEdit和一个发送按钮button(我的窗体是已经设计好了的)

文本框1(信息显示框)
刚拖出来的 TextBox 只能输入一行,只能横着拖,不能竖着拖,不用担心,点击文本框,点击右边(或者在左边)的属性,在行为下有一个multiline,将它设置为true,就可以实现多行输入,宽度就可以改变了。

添加垂直滚动条:找到 ScrollBars 属性,设置参数为 Vertical 。
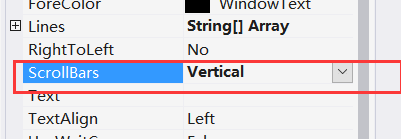
设置边界样式:找到 BorderStyle ,参数设置为 FixedSingle 。

设置只能读:

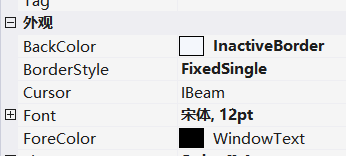
文本框2(输入框)
由于只是发送信息,没有什么特别的要求,设置一下字体和字号,颜色什么的就行了。
发送按钮
Text 属性,参数输入为 “ 发送 ” ,则控件上就会显示输入的字样。

窗体属性
Text 属性,编辑为 “ 客户端 ” ,然后窗体的左上角,就显示为 “ 客户端 ”。

AcceptButton 属性,下拉框选中这个 button1 按钮,设置完这个属性后,当我们最后执行这个程序后,按下回车键 = 点击这个按钮。

3.编写代码
客户端:
双击button进入函数编写:
 private void button1_Click(object sender, EventArgs e)
        {
            string str = "The current time: ";
            str += DateTime.Now.ToString("yyyy-MM-dd HH:mm:ss");
            textBox1.AppendText(str + Environment.NewLine);
            UdpClient udpSender = new UdpClient(0);
            int port = 8000;
            string host = "192.168.43.251";//我室友的IP地址
            IPAddress ip = IPAddress.Parse(host);
            IPEndPoint ipe = new IPEndPoint(ip, port);//把ip和端口转化为IPEndPoint实例
            udpSender.Connect(host, port);
            string message = textBox2.Text;
            byte[] sendBytes = Encoding.UTF8.GetBytes(message);
            udpSender.Send(sendBytes, sendBytes.Length);
            string sendStr = textBox2.Text;
            str = "The message content: " + sendStr;
            textBox1.AppendText(str + Environment.NewLine);
            str = "Send the message to the server...";
            textBox1.AppendText(str + Environment.NewLine);
            byte[] recvStr = udpSender.Receive(ref ipe);
            string message1 = Encoding.UTF8.GetString(recvStr, 0, recvStr.Length);
            str = "The server feedback: " + message1;//显示服务器返回信息
            textBox1.AppendText(str + Environment.NewLine);
        }
服务器:
在另一台电脑上创建一个控制台程序,同二.1
写入代码:
using System;
using System.Collections.Generic;
using System.Linq;
using System.Net;
using System.Net.Sockets;
using System.Text;
using System.Threading.Tasks;

namespace ConsoleApp2
{
    class Program
    {
        static void Main(string[] args)
        {
            int recv;
            byte[] data = new byte[1024];

            //得到本机IP,设置TCP端口号
            IPEndPoint ip = new IPEndPoint(IPAddress.Any, 8000);
            Socket server = new Socket(AddressFamily.InterNetwork, SocketType.Dgram, ProtocolType.Udp);

            //绑定网络地址
            server.Bind(ip);

            Console.WriteLine("这是客户端, 主机名为: {0}", Dns.GetHostName());

            //等待客户机连接
            Console.WriteLine("等待客户端发送数据...");

            //得到客户机IP
            IPEndPoint sender = new IPEndPoint(IPAddress.Any, 0);
            EndPoint Remote = (EndPoint)(sender);
            recv = server.ReceiveFrom(data, ref Remote);
            Console.WriteLine("消息来自于: {0}: ", Remote.ToString());
            Console.WriteLine(Encoding.UTF8.GetString(data, 0, recv));

            //客户机连接成功后,发送信息
            string welcome = "连接成功 ";

            //字符串与字节数组相互转换
            data = Encoding.UTF8.GetBytes(welcome);

            //发送信息
            server.SendTo(data, Remote);


            while (true)
            {
                data = new byte[1024];
                //发送接收信息
                //从客户机接受消息
                recv = server.ReceiveFrom(data, ref Remote);
                //将字节流信息转换为字符串
                string Data = Encoding.Default.GetString(data, 0, recv);
                //将字符串输出到屏幕上
                Console.WriteLine(Data);
                // Console.WriteLine(Encoding.Default.GetString(data, 0, recv));

                //定义字符串input
                string input;
                //读取屏幕上的字符串
                input ="连接成功";
                if (input == "exit")
                    break;
                //将input发送至客户机
                server.SendTo(Encoding.UTF8.GetBytes(input),Remote);
            }
            server.Close();
        }

    }

}
运行:


wireshark_365">4.使用wireshark抓包
发送中文:


英文:

数字:

四、端口扫描器
(一)单线程
1.新建项目
新建一个Windows窗体应用,布局如下:

一些属性设置自己定夺。
2.编写代码
双击button进入代码编写:
using System;
using System.Collections.Generic;
using System.ComponentModel;
using System.Data;
using System.Drawing;
using System.Linq;
using System.Net.Sockets;
using System.Text;
using System.Threading;
using System.Threading.Tasks;
using System.Windows.Forms;

namespace port
{
    public partial class Form1 : Form
    {


        //主机地址
        private string hostAddress;
        //起始端口
        private int start;
        //终止端口
        private int end;
        //端口号
        private int port;
        //定义线程对象
        private Thread scanThread;


        public Form1()
        {
            InitializeComponent();
        }

        /// <summary>
        /// 判断端口是否合理
        /// </summary>
        /// <returns></returns>
        private bool decideAddress()
        {
            //判断端口号是否合理
            if ((start >= 0 && start <= 65536) && (end >= 0 && end <= 65536) && (start <= end))
                return true;
            else
                return false;
        }


        private void PortScan()
        {
            double x;
            string xian;
            //显示扫描状态
            textBox1.AppendText("开始扫描...(可能需要请您等待几分钟)" + Environment.NewLine + Environment.NewLine);
            //循环抛出线程扫描端口
            for (int i = start; i <= end; i++)
            {
                x = (double)(i - start + 1) / (end - start + 1);
                xian = x.ToString("0%");
                port = i;
                //调用端口i的扫描操作
                Scan();
                //进度条值改变
                lb.Text = xian;
                lb.Refresh();
                progressBar1.Value = i;
            }
            textBox1.AppendText(Environment.NewLine + "扫描结束!" + Environment.NewLine);
            //输入框textbox只读属性取消
            textBox2.ReadOnly = false;
            textBox3.ReadOnly = false;
            textBox4.ReadOnly = false;
        }

        /// <summary>
        /// 扫描某个端口
        /// </summary>
        private void Scan()
        {
            int portnow = port;
            //创建TcpClient对象,TcpClient用于为TCP网络服务提供客户端连接
            TcpClient objTCP = null;
            try
            {
                //用于TcpClient对象扫描端口
                objTCP = new TcpClient(hostAddress, portnow);
                //扫描到则显示到显示框
                textBox1.AppendText("端口 " + port + " 开放!" + Environment.NewLine);
            }
            catch
            {
                //未扫描到,则会抛出错误
            }
        }

        private void button1_Click(object sender, EventArgs e)
        {
            try
            {
                //初始化
                textBox1.Clear();
                lb.Text = "0%";
                //获取ip地址和始末端口号
                hostAddress = textBox2.Text;
                start = Int32.Parse(textBox3.Text);
                end = Int32.Parse(textBox4.Text);

                if (decideAddress()) // 端口合理
                {
                    //让输入的textbox只读,无法改变
                    textBox2.ReadOnly = true;
                    textBox3.ReadOnly = true;
                    textBox4.ReadOnly = true;
                    //设置进度条的范围
                    progressBar1.Minimum = start;
                    progressBar1.Maximum = end;

                    //显示框显示
                    textBox1.AppendText("端口扫描器 v1.0.0" + Environment.NewLine + Environment.NewLine);
                    //调用端口扫描函数
                    PortScan();
                }
                else
                {
                    //若端口号不合理,弹窗报错
                    MessageBox.Show("输入错误,端口范围为[0-65536]!");
                }
            }
            catch
            {
                //若输入的端口号为非整型,则弹窗报错
                MessageBox.Show("输入错误,端口范围为[0-65536]!");
            }
        }
    }
}
运行:

仅10个端口都花费了十几秒,比较慢。
(二)多线程
1.新建项目
和四.(一)一样,布局也一样。
2.编写代码
双击button。。。:
using System;
using System.Collections.Generic;
using System.ComponentModel;
using System.Data;
using System.Drawing;
using System.Linq;
using System.Net.Sockets;
using System.Text;
using System.Threading;
using System.Threading.Tasks;
using System.Windows.Forms;

namespace port
{
    public partial class Form1 : Form
    {


        //主机地址
        private string hostAddress;
        //起始端口
        private int start;
        //终止端口
        private int end;
        //端口号
        private int port;
        //定义线程对象
        private Thread scanThread;
        //定义端口状态数据(开放则为true,否则为false)
        private bool[] done = new bool[65526];
        private bool OK;


        public Form1()
        {
            InitializeComponent();
            //不进行跨线程检查
            CheckForIllegalCrossThreadCalls = false;
        }

        /// <summary>
        /// 判断端口是否合理
        /// </summary>
        /// <returns></returns>
        private bool decideAddress()
        {
            //判断端口号是否合理
            if ((start >= 0 && start <= 65536) && (end >= 0 && end <= 65536) && (start <= end))
                return true;
            else
                return false;
        }


        private void PortScan()
        {
            double x;
            string xian;
            //显示扫描状态
            textBox1.AppendText("开始扫描...(可能需要请您等待几分钟)" + Environment.NewLine + Environment.NewLine);
            //循环抛出线程扫描端口
            for (int i = start; i <= end; i++)
            {
                x = (double)(i - start + 1) / (end - start + 1);
                xian = x.ToString("0%");
                port = i;
                //使用该端口的扫描线程
                scanThread = new Thread(new ThreadStart(Scan));
                scanThread.Start();
                //使线程睡眠
                System.Threading.Thread.Sleep(100);
                //进度条值改变
                lb.Text = xian;
                progressBar1.Value = i;
            }
            while (!OK)
            {
                OK = true;
                for (int i = start; i <= end; i++)
                {
                    if (!done[i])
                    {
                        OK = false;
                        break;
                    }
                }
                System.Threading.Thread.Sleep(1000);
            }
            textBox1.AppendText(Environment.NewLine + "扫描结束!" + Environment.NewLine);
            //输入框textbox只读属性取消
            textBox2.ReadOnly = false;
            textBox3.ReadOnly = false;
            textBox4.ReadOnly = false;
        }

        /// <summary>
        /// 扫描某个端口
        /// </summary>
        private void Scan()
        {
            int portnow = port;
            //创建线程变量
            Thread Threadnow = scanThread;
            //扫描端口,成功则写入信息
            done[portnow] = true;
            //创建TcpClient对象,TcpClient用于为TCP网络服务提供客户端连接
            TcpClient objTCP = null;
            try
            {
                //用于TcpClient对象扫描端口
                objTCP = new TcpClient(hostAddress, portnow);
                //扫描到则显示到显示框
                textBox1.AppendText("端口 " + port + " 开放!" + Environment.NewLine);
            }
            catch
            {
                //未扫描到,则会抛出错误
            }
        }

        private void button1_Click(object sender, EventArgs e)
        {
            try
            {
                //初始化
                textBox1.Clear();
                lb.Text = "0%";

                //获取ip地址和始末端口号
                hostAddress = textBox2.Text;
                start = Int32.Parse(textBox3.Text);
                end = Int32.Parse(textBox4.Text);

                if (decideAddress()) // 端口合理
                {
                    //让输入的textbox只读,无法改变
                    textBox2.ReadOnly = true;
                    textBox3.ReadOnly = true;
                    textBox4.ReadOnly = true;
                    //创建线程,并创建ThreadStart委托对象
                    Thread process = new Thread(new ThreadStart(PortScan));
                    process.Start();
                    //设置进度条的范围
                    progressBar1.Minimum = start;
                    progressBar1.Maximum = end;

                    //显示框显示
                    textBox1.AppendText("端口扫描器 v1.0.0" + Environment.NewLine + Environment.NewLine);
                }
                else
                {
                    //若端口号不合理,弹窗报错
                    MessageBox.Show("输入错误,端口范围为[0-65536]!");
                }

            }
            catch
            {
                //若输入的端口号为非整型,则弹窗报错
                MessageBox.Show("输入错误,端口范围为[0-65536]!");
            }
        }
    }
}
运行:

20个端口一瞬间就扫描好了,多线程大大提高了效率。
(三)抓包
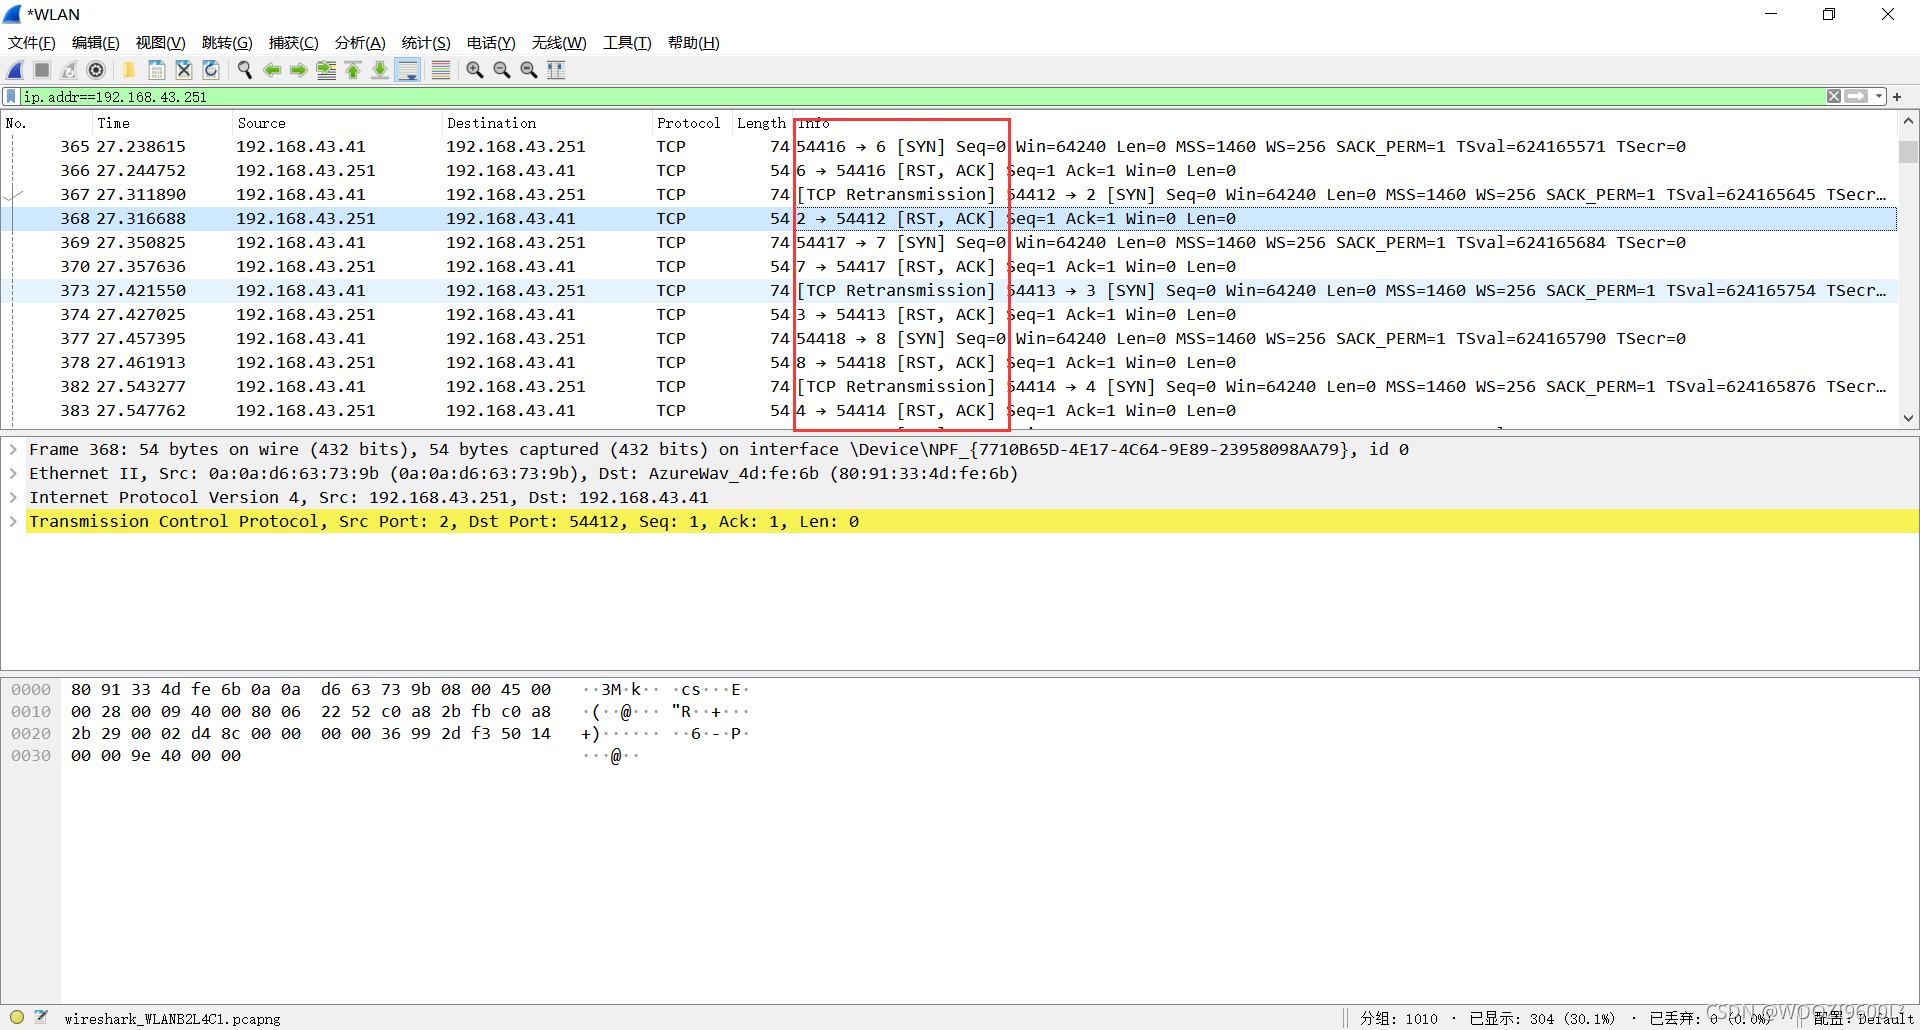
多线程扫描时的抓包结果,在info栏可以看到端口,看到端口的扫描顺序和我们代码里写的是一致的,而后面顺序比较混杂,是因为端口连不上也会有一系列命令,所以才造成这种局面:
五、总结
第一次写C#,相关语句还不太熟练,用的时间比较长。窗体程序和之前写QT是的可视化有着异曲同工之妙,但感觉比QT要简单一点。多线程能有效提高程序的工作效率。
参考资料
https://blog.csdn.net/qq_38537501/article/details/115552769
https://blog.csdn.net/ssj925319/article/details/109336123
https://blog.csdn.net/qq_30725967/article/details/86590506
https://docs.microsoft.com/zh-cn/dotnet/api/system.net.sockets.udpclient.receive?view=net-6.0